How to Order Paper for UBCO Supported Printers, Copiers & Faxes
Ordering Paper for Pay-for-Print Devices
The following outlines the process to order paper for UBC Okanagan managed print devices (multi-purpose devices for print, copy and/or fax).
Please contact Toni Lee (toni.lee@ubc.ca) with any questions about this process or to onboard new staff who will be ordering paper for your department.
Printer Paper Order Process in Workday - Overview
For detailed step by step screenshots of the process CLICK HERE.
- Login to Workday
- Select Purchases
- Create Requisition (this is linked to a Job Aid on How to Create a Requisition and order from a Supplier Catalogue in Workday)
- Change the Program Code to PM004024 (this will charge the paper cost to UBC IT Okanagan)
- Change Deliver-To to your department mailroom, office or printer location
- You can search by the 3 letter building code <space> room # (e.g. ASC 413)
- Change your Workspace (In Workday, HR administrators set an employee’s ‘Location’ as their primary place of work, typically using the building’s name. The building’s street address is the employee’s ‘Work Address’. When more details are required (e.g. for delivery of goods or services), setting a ‘Work Space’ can also specify room numbers, floors, and other building information. Workers, Managers, and HR Administrators can update an employee’s Work Space)
- You can search by the 3 letter building code <space> room # (e.g. ASC 413)
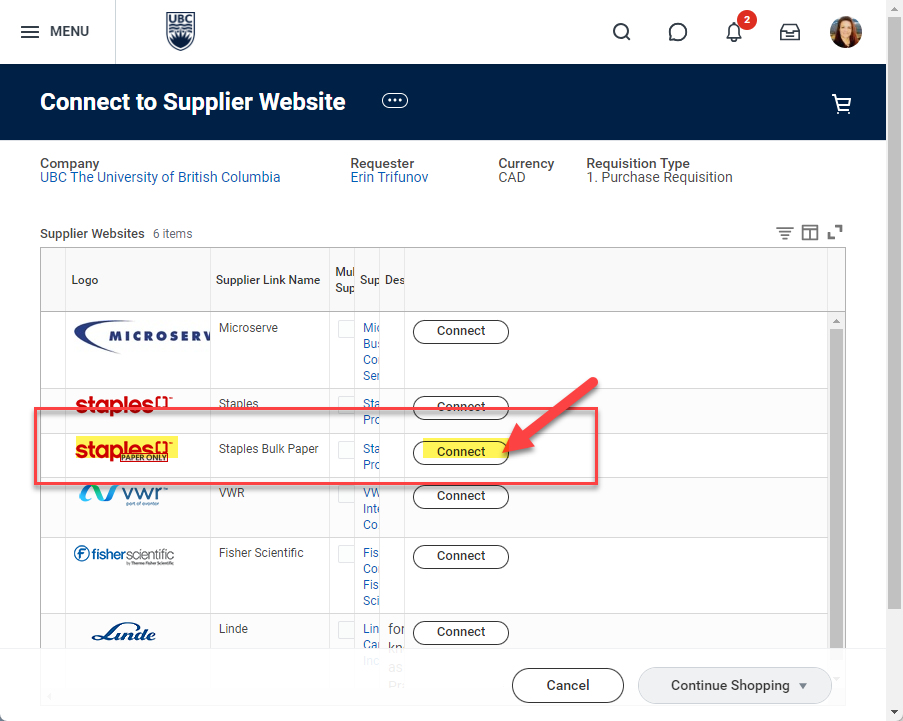
- Connect to Supplier Website -> Staples PAPER ONLY -> Connect

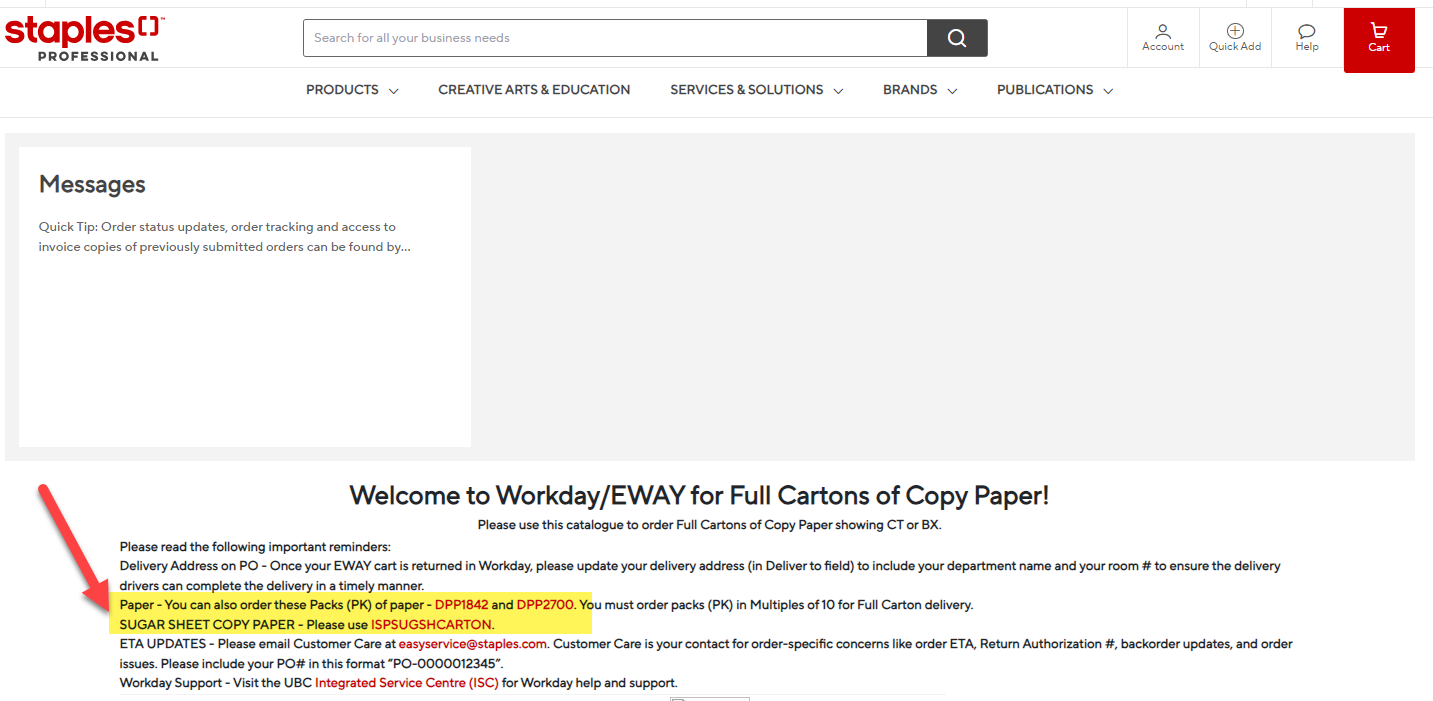
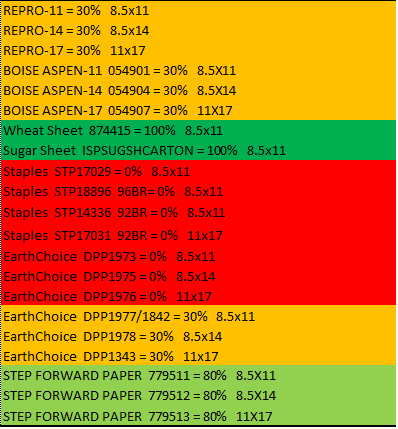
- On the Staples Paper website, search for the needed paper type and size (UBC Sustainability recommends Earth Choice 30% recycled copy paper)

UBCO's Sustainability Office has provided a list of recommended (green) paper products as well as those to avoid (red).

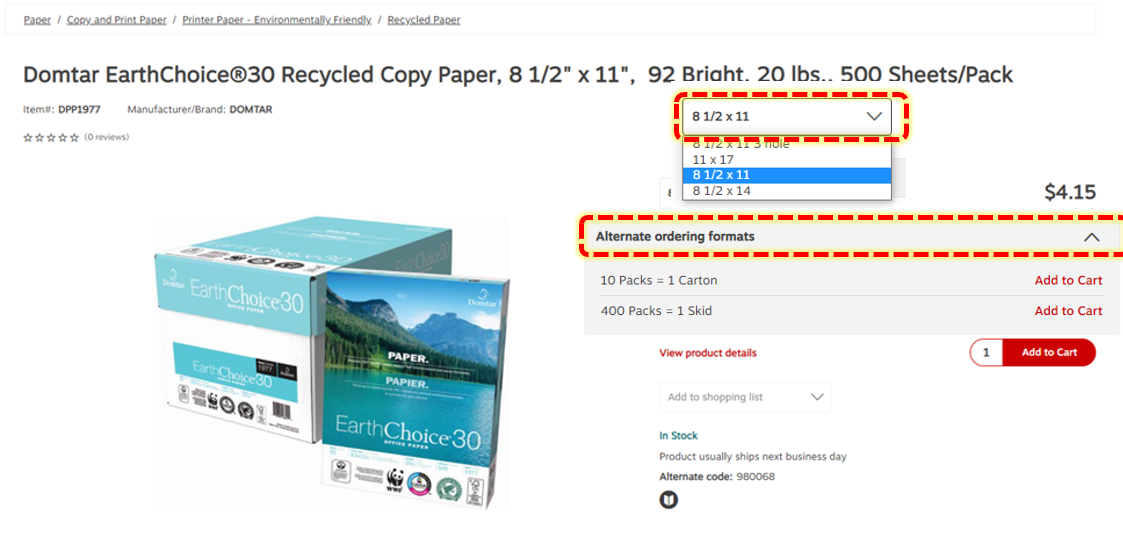
- Click on the product name (NOT Add to Cart) to select different order formats first

- Select “Alternate Ordering Formats” grey drop down menu to see other qty options (e.g. carton & skid)

- Add desired quantity to cart -> Checkout - > Submit Order
- Add Internal Memo:
- Department(s) who the order is for
- Printer# the order is for;
- e.g. School of Engineering P0444
- Click “Checkout” – review details
- Confirm Deliver-To address is correct (printer location, or department mailroom, etc)
- Add Memo to Supplier if needed (e.g. with info on how to access rooms, or contact info if required)
- Add Internal Memo (copy same info from previous screen - Dept Name & Printer # P0XXX)
- Edit any fields as required (click 3 dots at bottom right of screen next to "Continue Shopping" button)
- Click SUBMIT

- Request is sent to IT Admin to approve (IT covers all cost, no need to have paper charges reimbursed to departments)
- Paper is delivered to Deliver-to Location
- LAST STEP! Create Receipt to issue invoice to be paid (will be charged to IT)
- In Workday, click on Purchases - > Create Receipt (follow steps in Job Aid linked above)
- The Create Receipt process enables Workday to automatically perform 3-way matching (i.e., matching information of the goods/services received, the Purchase Order and the supplier invoice) and if they all match, Workday will automatically approve the invoice and process payment.
- In Workday, click on Purchases - > Create Receipt (follow steps in Job Aid linked above)
Please contact Toni Lee (toni.lee@ubc.ca) with any questions about this process or to onboard new staff who will be ordering paper for your department.
 149.13 KB)
