Studio123 (LIB123) Overview & Troubleshooting
About:
Studio123 (LIB123) is located on the Library main floor. Studio123 has been designed for ease of use with the focus of media creation. Please do not unplug or otherwise tamper with any of the equipment in the studio. It is not intended to be used as a study room and has a strict No Food, No Drink policy.
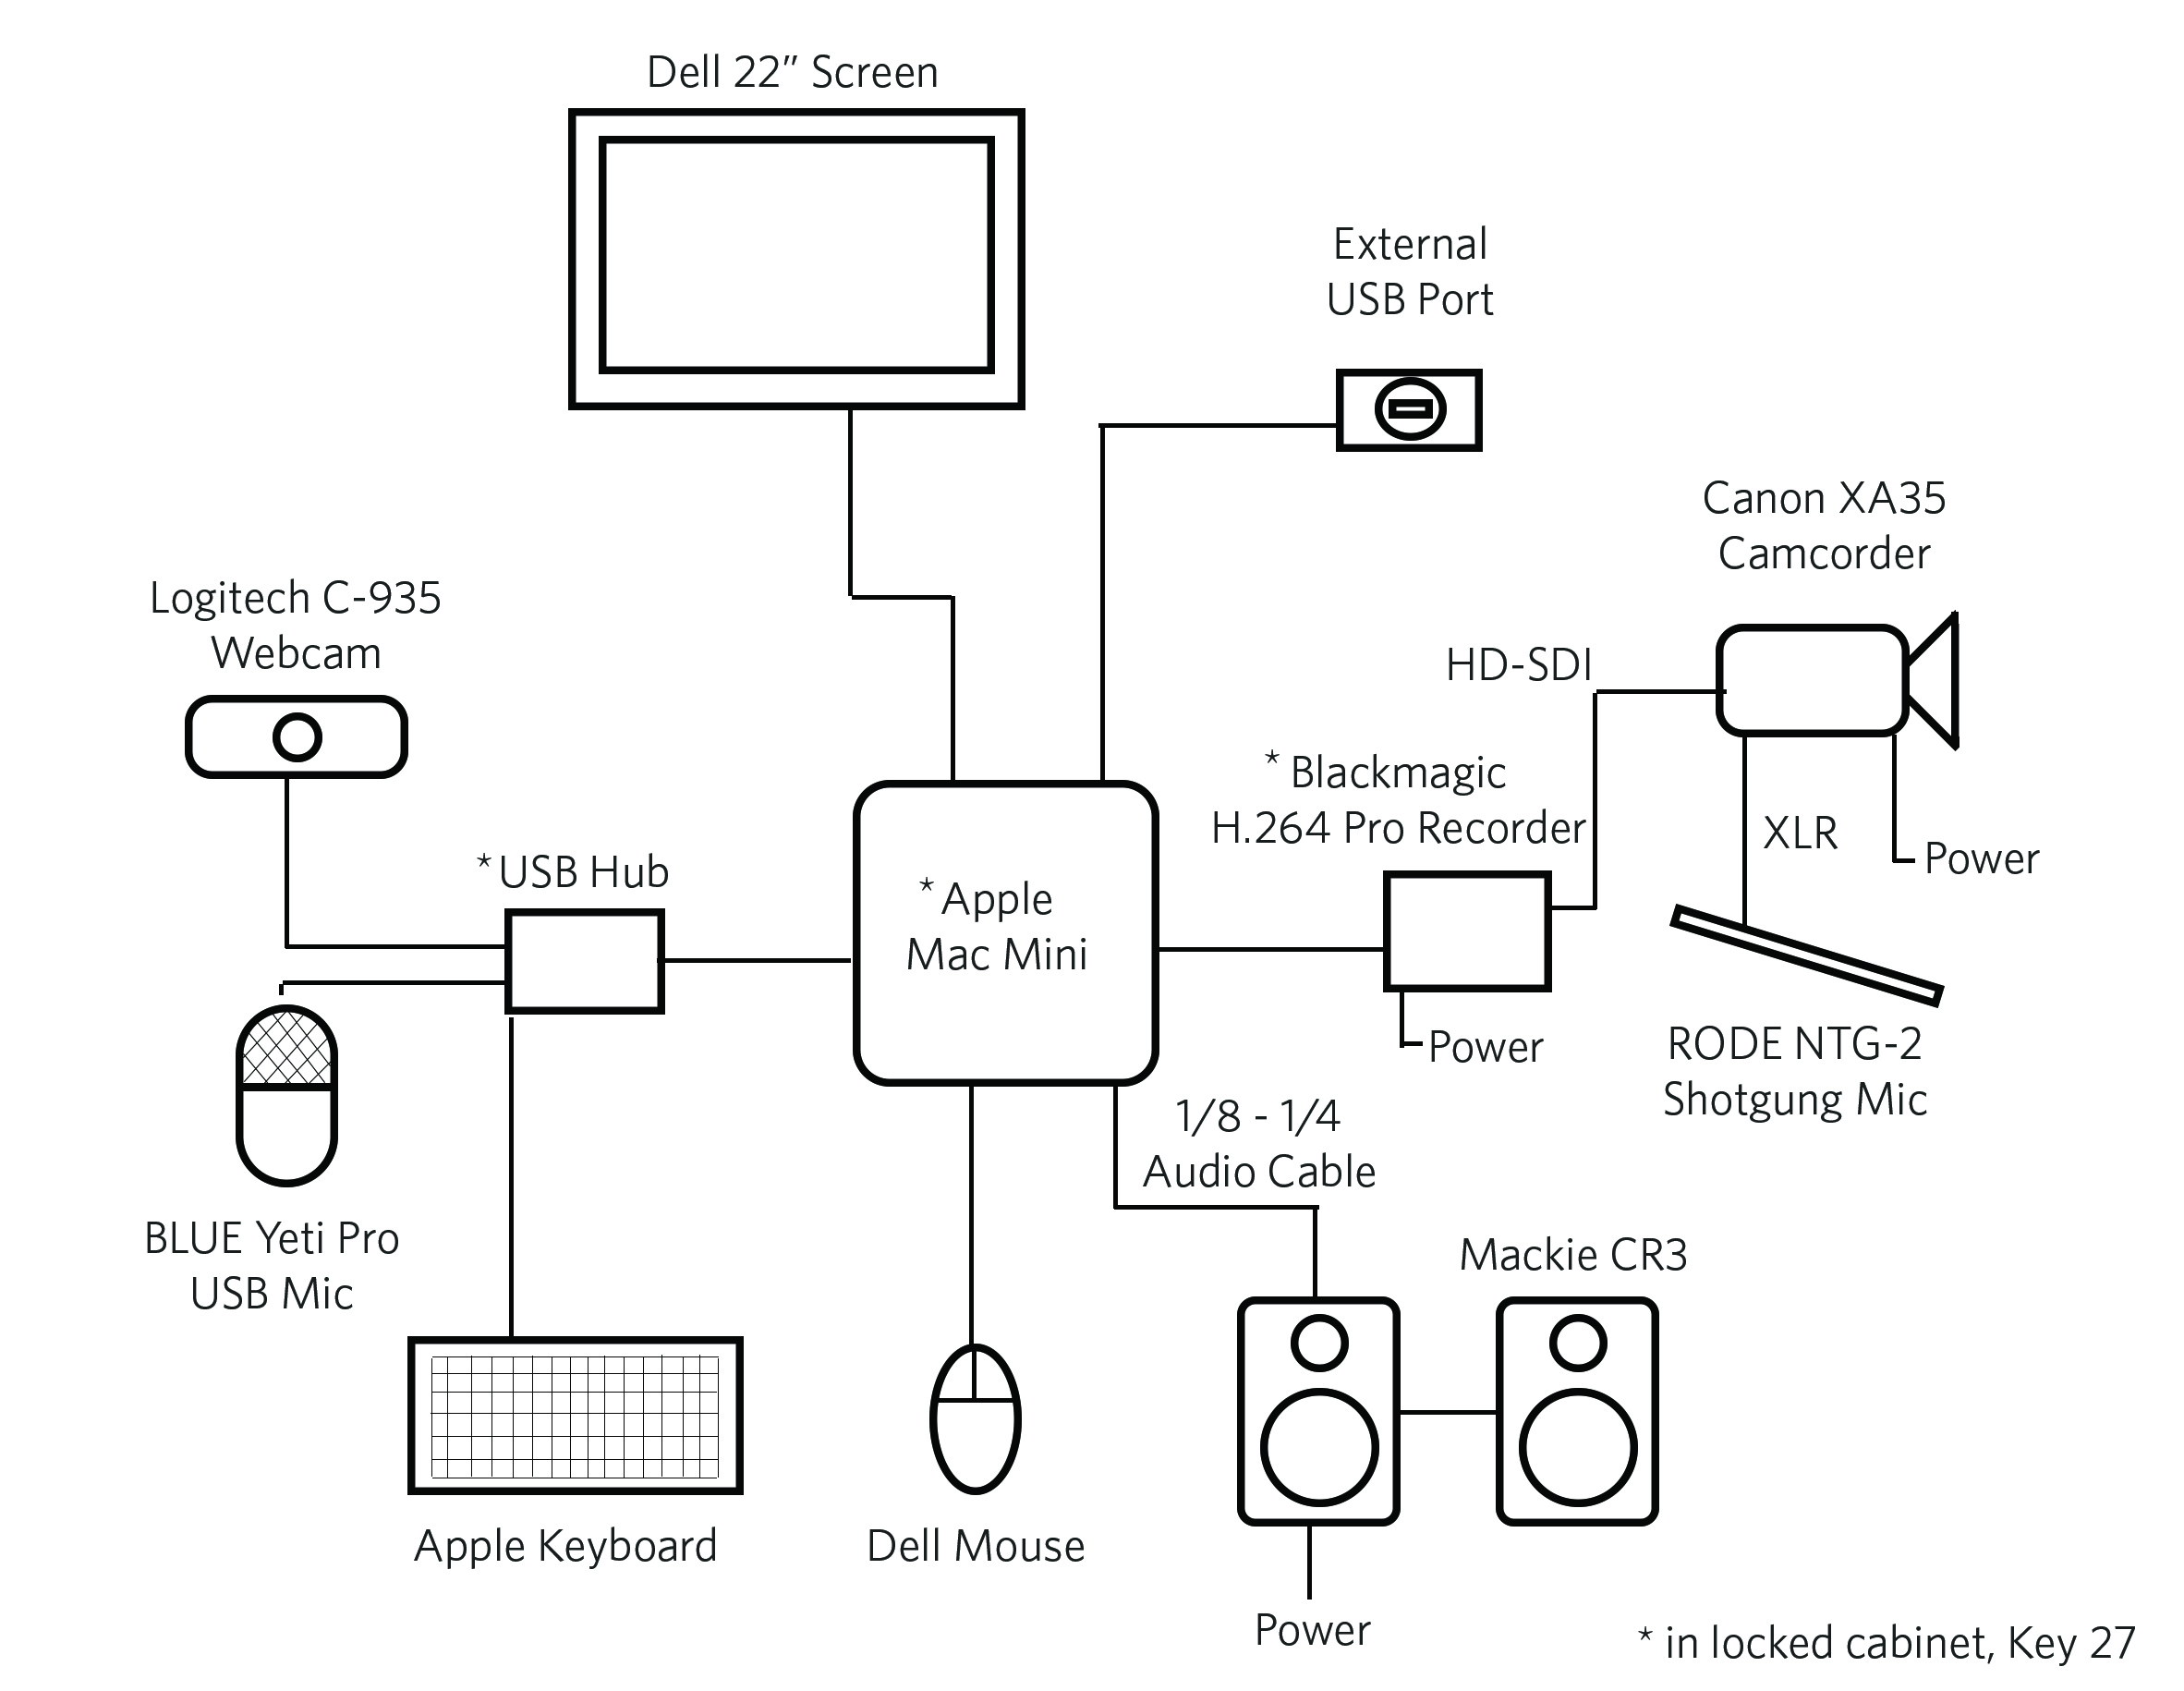
This article contains general information about Studio123, troubleshooting tips, and equipment list and wiring diagram.
Booking:
Studio123 is available during standard Library hours.
To book visit UBC Studios Okanagan Spaces page hxxps://ubcstudios.ok.ubc.ca/studio_spaces/studio123, or the Studio123 QReserve page: hxxps://my.qreserve.com/reservable/12crvi32e2mn5tygnd2sh5d87em1uvjiqkv4tn.
Features:
The studio has been outfitted with acoustic treatments, light control blinds, and specialized LED filming lights. The room is also equipped with high-quality video and audio capture devices.
The software featured are:
1. Audacity for simple audio-only recording using the supplied USB microphone
2. OcenAudio for simple audio-only recording using the supplied USB microphone
3. QuickTime Video for quick video capture using the HD camera and ceiling-mounted shotgun microphone
Trouble Shooting:
To simplify support, there is a Help Phone located in the room with direct lines to:
- Helpdesk - network, user accounts, after-hours support
- UBC Studios Okanagan - software, creative support
- Security - due to the private and enclosed nature of the space, there is a line for Emergency and Non-Emergency
Audacity/OcenAudio
No Audio Levels when trying to record. (Note: you will not hear your audio while recording)
- Make sure you've clicked "Click to Start Monitoring" on the Recording Meter Toolbar to activate Audio Gauges
- Make sure red light on microphone is solid (blinking means mic is muted), press button to toggle
- Make sure connections on bottom of mic are secure
- Make sure mic "volume" or "Gain" is set to the 12 o'clock position (located on the back of mic)
No Audio Levels Continued
- Check System Preferences>Sound>Input. Ensure Blue USB Microphone is selected and Input volume is set to 75%
- Check Audacity's settings. Audacity>Preferences>Devices. Ensure Blue USB Microphone is selected.
No Audio on playback of recording
- Make sure there are visible waveforms recorded in the track, and the Playback Meter Toolbar is active
- Ensure the desktop speakers are turned on (green light is on) and unplug any devices from the front of the left desktop speaker
- Adjust the volume on the left desktop speakers using the front facing volume knob
- Make sure Audio Track is not Muted
- Make sure Audio Track volume slider is set to the mid point (Gain: 0 dB)
QuickTime Video
Equipment


