How to purchase software
UBC Provided Software
UBC IT is able to provide a variety of software programs at no cost for the university community. For a list of available, no-cost software and download links visit the UBC IT Software Licensing page.
All UBCO computer labs have Microsoft Office installed. Individual labs may also have a variety of other specific software installed to meet instructional needs. Visit our UBCO Computer Lab page for more details on software installed in each lab, or this article summarizes the available campus-wide software licenses at the Okanagan campus.
Department Funded Software Requests
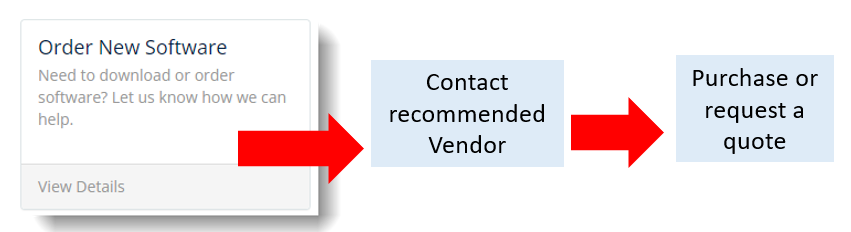
To align with procurement best practices and better support our growing campus, we have revised the purchase process for department funded software. UBCO IT will provide advice on recommended vendors and licenses however the department is responsible for getting their own quotes from the vendor and either paying for the software directly (e.g. using their UBC credit card), or submitting a purchase request in Workday.
Data Privacy
Not sure what software you need?
If you are unsure what software you should order, our IT support team can help provide you with recommendations.
To request a software consultation:
-
Log into the UBC Self Service Portal
-
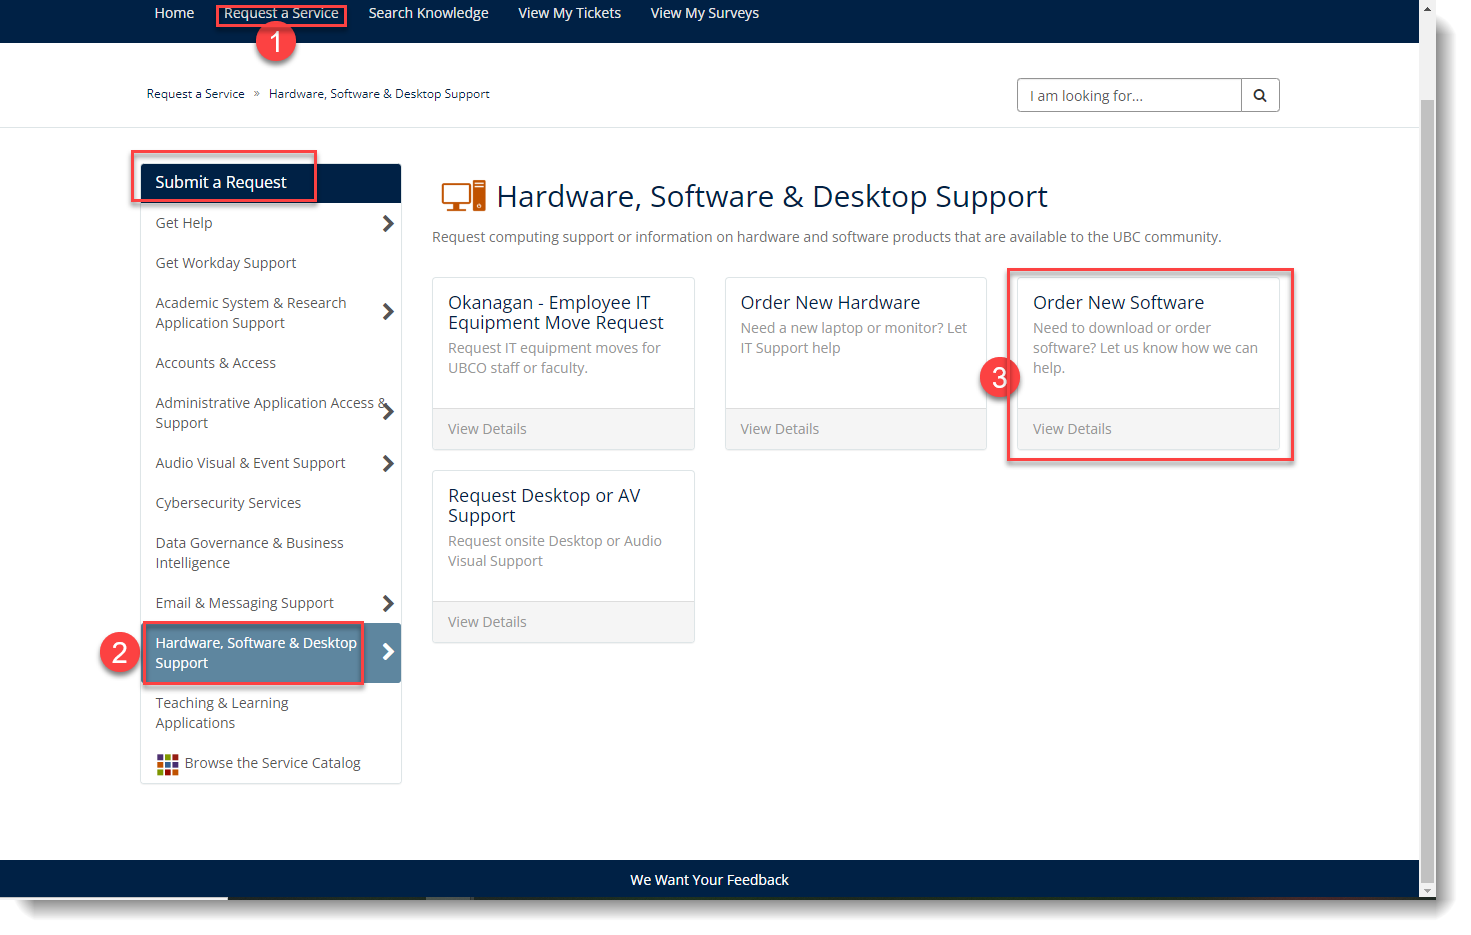
Click on "Request a Service"
-
From the left side menu, click on "Hardware, Software & Desktop" – then on the right, select the box that says "Order New Software"
- Select the type of software and purpose of the use (instructional, research, admin) and provide the details as needed - then click Submit.
An IT Support analyst will contact you shortly with recommendations and instructions on how to obtain a quote for the recommended software.
How to Purchase Non-Catalogue Software in Workday
A Purchase Requisition is required to request that a Purchase Order be issued to a supplier to purchase goods or services. At UBC, all purchases over $3,500 require a purchase order (unless there is a specific exemption), as well as some purchases under $3,500 which are not listed in a Workday Catalogue (see below for details about Catalogues).
- Please note that non-catalogue Purchase Requests require a quote from the supplier to be attached to support the requisition.
- Refer to the Finance Buy webpage for information on buying goods and services under/over $3,500.
Catalogues are a new e-procurement solution that simplify the purchasing experience with preferred UBC vendors. There are five vendor catalogues available when creating a Workday requisition. However orders may be placed outside of the catalogue portal if needed, using the non-catalogue option.
- View our article on How to Order Computer Equipment in Workday from a Catalogue for instructions on this process.
- Refer to the Finance Catalogues webpage for more information.
Workday: Purchase Requisition Process
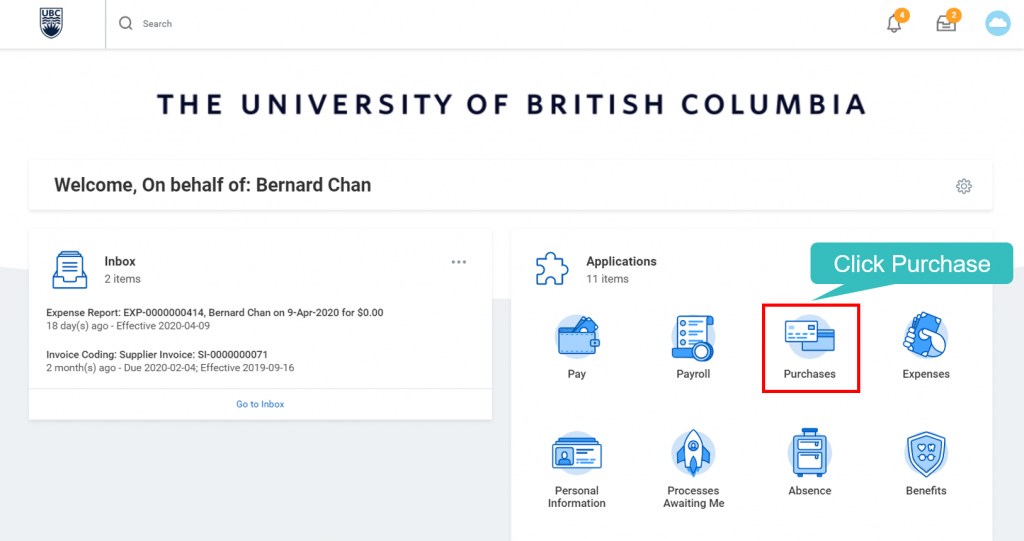
- Login to Workday
- Select Purchases
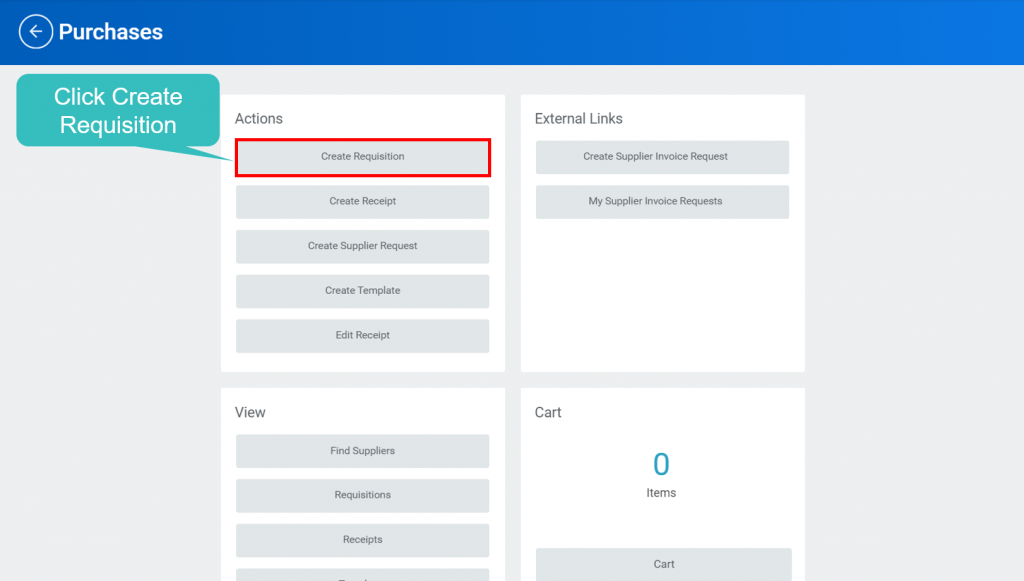
- Under Purchases, click Create Requisition.
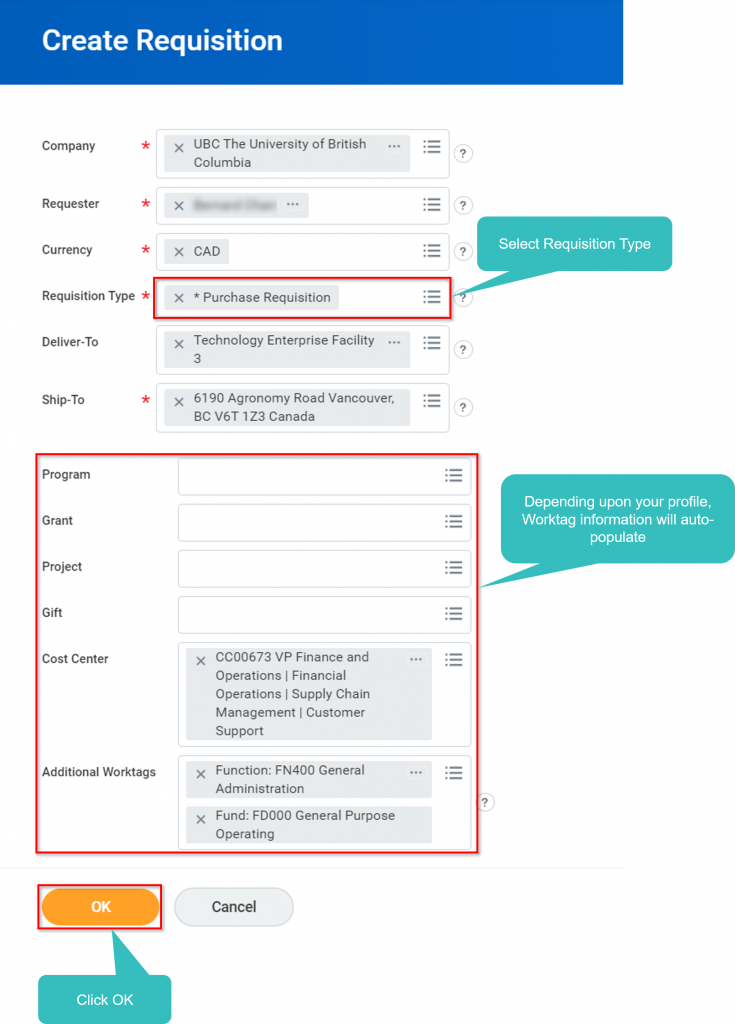
- Enter Requisition Details - Select Requisition Type: Purchase Requisition
- Select "Request Non-Catalogue Items"

-
Enter the details of the software: confirm Requisition Currency; select Request Goods.
Item Description: Software license name
Spend Category: type: "soft" and "Software Licenses and Subscriptions" will display
Supplier: enter the vendor name.
Unit of Measure: Each
**Memo**: please write the INC# of the UBC Self-Service request you submitted to consult with UBCO IT on your software needs. Failure to include a reference to an incident # or that you have consulted with IT may delay the approval of your request.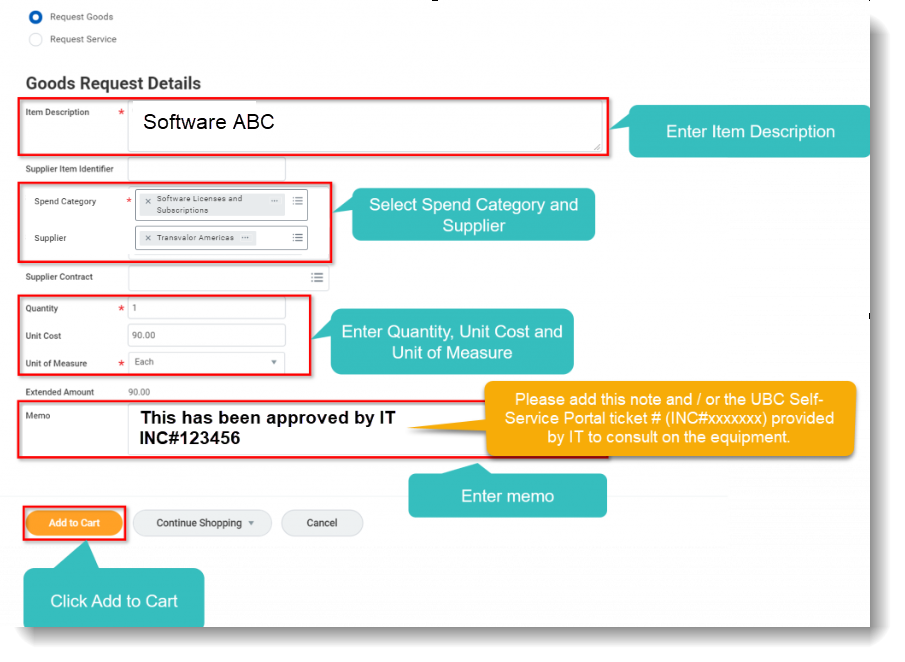
- A notification will pop up on the screen confirming the item is ‘Added to Cart’.
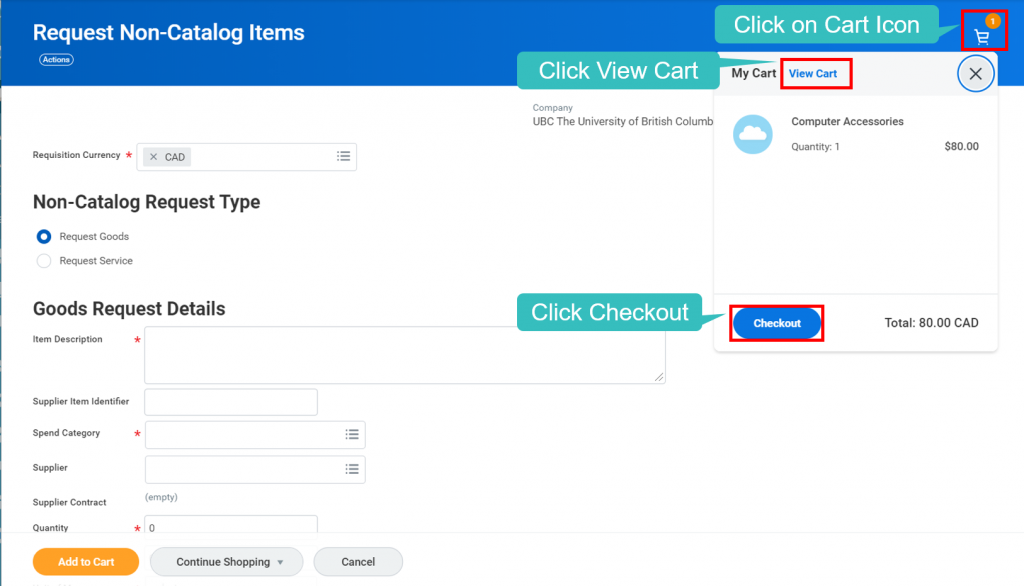
- Click the Shopping Basket icon to review the cart. You will have two options:
- View Cart – Click on View Cart to go to the cart and edit the item details if needed.
- Checkout – Click on Checkout if you wish to go directly to the checkout page.
-
Verify Check out details
Shipping Address Information is added by default - the IT Buyer will revise this address if required. (Note: If you wish to edit the Deliver-To and Ship-To Address, click Edit Address as shown in the screen shot below).
Requisition Information will be pre-populated. You can modify the values if needed.
Memo to Supplier - ***IMPORTANT*** Please include the email and contact information of the person requesting the software, any technical contact (if the software requires IT support for installation or licensing please add Clay Pakenham) and ideally an admin contact. This will ensure any renewal notices are sent to multiple people so as not to get lost and risk disruption to services.
Internal Memo - ***IMPORTANT*** Enter the same info as provided before in the Memo field to the Internal Memo field here as well. Not providing a Memo to let the IT Buyer know you have consulted with IT and ideally have a ticket # as reference the request may be sent back for more details. (Memo to Suppliers is for external users and will show on the PO sent to the supplier; it is not normally required).
- Attach the quote, screen shot or detailed equipment and pricing specs from the supplier (this is required to issue the PO).
**You may need to click the small black arrow next to the word "Attachments" to open the field up before you are able to drag and drop in the file or upload it from your computer.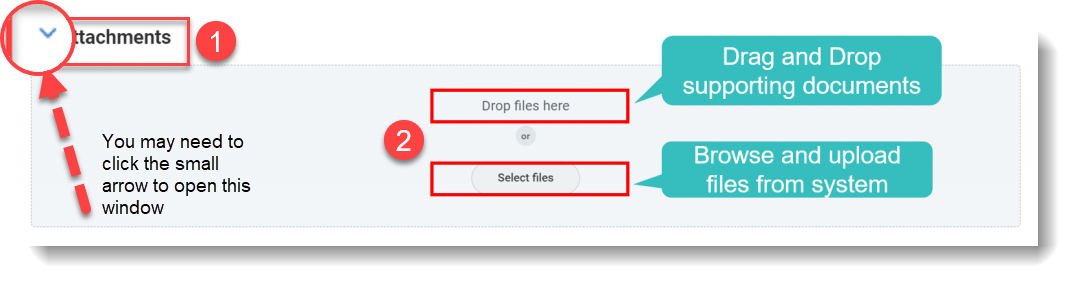
-
Verify worktags and tax information
Verify the details under Goods and/or Services Section.
Verify the Tax information. Tax and Tax Recoverability details will be pre-populated.
Note: Tax Recoverability for PST and QST should always be “Nonrecoverable + Allocate”. If the PST and/or QST tax recoverability shows as “67% Recoverable” + Allocate and a validation Error is triggered, manually change it to “Nonrecoverable + Allocate”.
Scroll right in the Goods section to add appropriate Worktags. You can choose to select any of the Worktags (Program, Project, Grant, Gift, Cost Center). If you select any one of Program, Project, Grant, or Gift, Cost Center and Additional Worktags information will auto-populate.
Note: Worktag represents the lowest level of financial oversight. It identifies a department or unit to which costs are charged and is typically used to house people and their associated payroll cost, and operating expenses.
-
Click Submit to submit the Purchase Request for further approvals.
Click Process to view the Approval Workflow and identify the Approver.
View the Process History and click the Remaining Process to view the remaining stages in the approval workflow and the approvers of each stage.
-
Next Steps - Once your order has been submitted to the supplier via a Purchase Order and the order has been confirmed by the supplier, you will receive a confirmation from the vendor with information on how to download and install the software.
