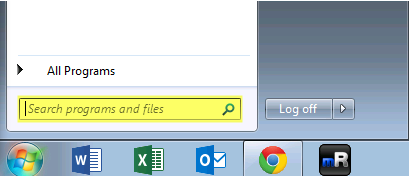
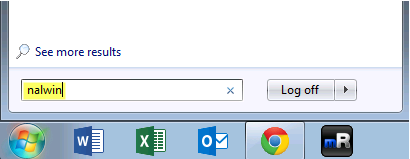
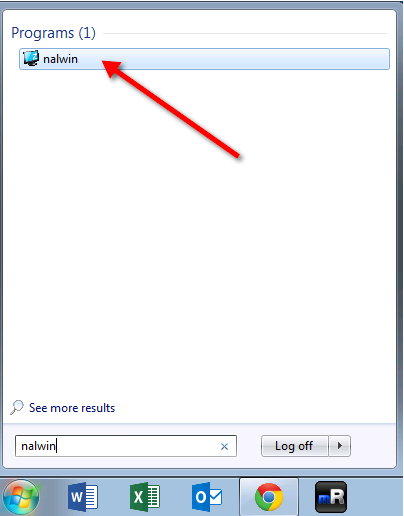
This article describes how to self-install campus-licensed software on supported computers running Windows. For instructions on installing campus-licensed software on supported computers running Windows, please see How do I install campus-licensed software on a computer running OSX? .
Requirements:
To perform self-installs, you must be using a computer that is:
Instructions:
Before you begin, connect to the campus wired or wireless network. If you connect to the wired network, your installations will go substantially quicker.
If, at this point, you do not see the nalwin program at the top of your start menu, your computer is not configured for self-installation. You can submit a ticket through the helpdesk to have a technician perform the installation of your software, and configure your machine so that you can self-install campus licensed software in the future.
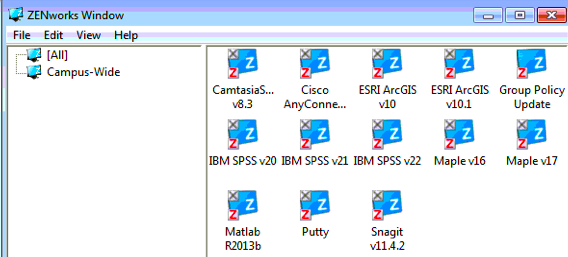
Software installation may take up to 30 minutes with larger applications.
Installations must be run consecutively, not concurrently. If you run concurrent installs, Windows will cancel the second install and display an error message. This does not break anything - you can retry the install when the first install is completed.
If you are running a computer with Windows XP, please submit a ticket through our helpdesk to inquire about available upgrade options.
Article ID: 15
Created On: Tue, Apr 8, 2014 at 1:11 PM
Last Updated On: Tue, Mar 28, 2017 at 2:13 PM
Authored by: Aaron Heck
Online URL: https://knowit.ok.ubc.ca/article/how-do-i-install-campus-licensed-software-on-a-computer-running-windows-15.html