How do I get my print job to staple on a Xerox multifunction device from OSX?


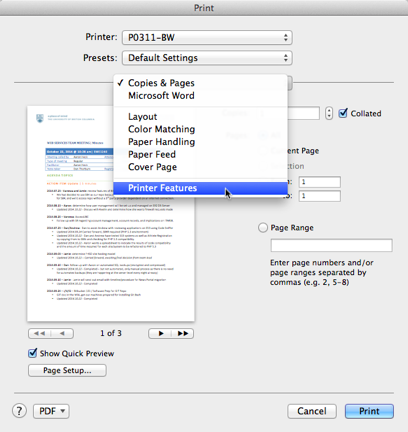
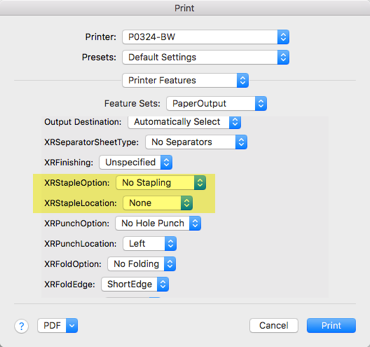
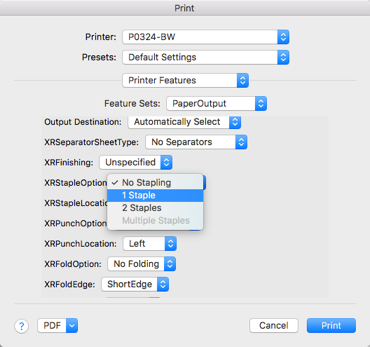
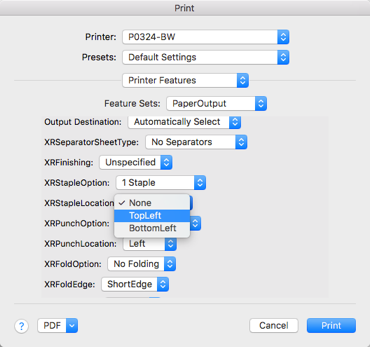
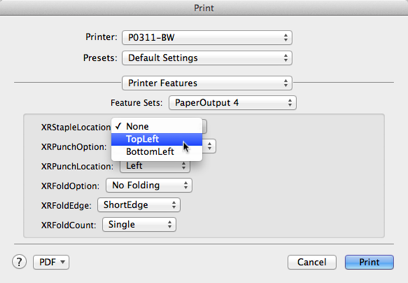
Follow these instructions to get your print job to staple when printing from OSX to a Xerox multifunction device.

Requirements:

These instructions apply to OSX systems printing to any campus Xerox multifunction device.

Instructions:

  1. From the Print dialog box , in the application settings drop down menu [location varies from app to app – if you don’t see it, look for a Show Details button in the print dialog box], select the Printer Features option.

  2. From the Feature Sets drop down, select  PaperOutput .  If you do not see PaperOutput , but you do see PaperOutput 3 , please follow the alternate instructions located at the bottom of this document.

  3. Scroll down until you can see the  XRStapleOption and the  XRStapleLocation features.

  4. From the XRStapleOption dropdown, select 1 Staple .

  5. From the XRStapleLocation option, select TopLeft .

  6. Click the Print button to print your document.

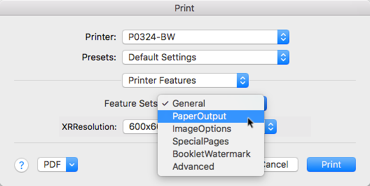
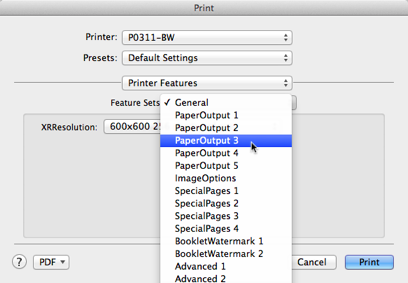
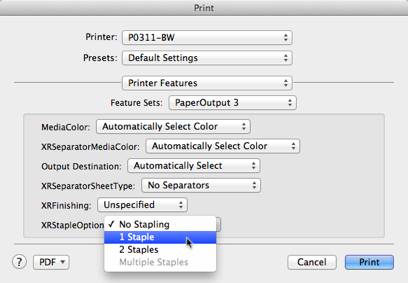
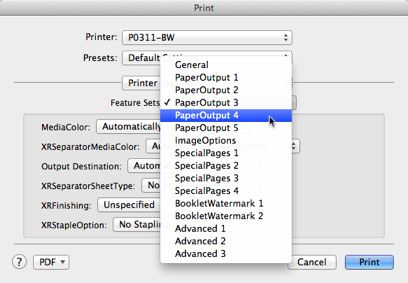
Alternative - PaperOutput 3

  1. From the Feature Sets drop down, select PaperOutput 3 .

  2. From the XRStapleOption dropdown, select 1 Staple .

  3. From the Feature Sets drop down, select PaperOutput 4 .

  4. From the XRStapleLocation option, select TopLeft .

  5. Click the Print button to print your document.

If you frequently use stapling or other print options for your print jobs, the following article will save you time by showing you how to set them as a quickly available print preset in OSX:
How do I save my printer options for quick recall on OSX?  

 
For more information or assistance, please contact the ITServices Helpdesk - 250.807.9000 or 855.807.9001.


Article ID: 129
Created On: Fri, Oct 31, 2014 at 4:51 PM
Last Updated On: Mon, Oct 31, 2016 at 1:20 PM
Authored by: Aaron Heck

Online URL: https://knowit.ok.ubc.ca/article/how-do-i-get-my-print-job-to-staple-on-a-xerox-multifunction-device-from-osx-129.html