Creating an Archive in Outlook for Windows


UBC Okanagan Internal Use Only

The content of this article is intended to be used by University of British Columbia Okanagan staff and faculty members.  It does not apply to the general public.


Archiving saves space in your mailbox when it gets full. It moves your emails from the mailbox on the server, to a file that you store locally on your machine. Emails that are stored in an archive file are not backed up on the FASmail server. These instructions are meant for Windows machines only. Archiving on Mac computers is not recommended. 
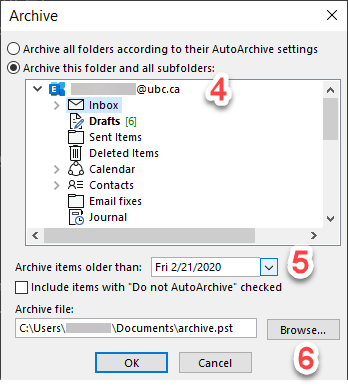
 

Collecting all mail locally for Archival:

  1. Open Outlook.

  2. Click on File.

  3. Click Info à Account Settings à Account Settings.

  4. Select the email address you wish to archive and click Change.

  5. Click and drag the Download email for the past: slider, all the way to the right, to the download All emails option. Also ensure the checkbox for Use Cached Exchange Mode is selected, if not already.  Please note that your screen may be slightly different.  The important thing is that the check box is selected and the slider is all the way to the right.

  6. Click Next to complete the change and close Outlook for the changes to take place.

  7. Once you re-open Outlook, you will see folder update messages along the bottom of the window.

    This process may take some time to complete but it is important not to start the archive until this process has completed and shows All folders are up to date.


Creating the Archive file:

  1. Open Outlook.

  2. Click on File.

  3. Click on Info à Tools à Clean up old items.

  4. Choose the email address you would like to make an archive for. Ensure you are selecting the email address above the inbox and not the inbox itself. This ensures the whole account is archived and not just the inbox.

  5. Choose the date you wish to archive emails older than (most commonly a year from today’s date).

    6. Provide a name and select the location where you would like to save the archive (pst) file.

    1. Click on Browse

    2. Select the location where you wish to store your archive file.
      • Note: Do not use a UBC Network storage medium to store your Archive file (ie. K, P, H drives)

    3. Give the filename a useful name for easy identification (ie. Archive2021, Inbox2019, etc).

7. Click OK.

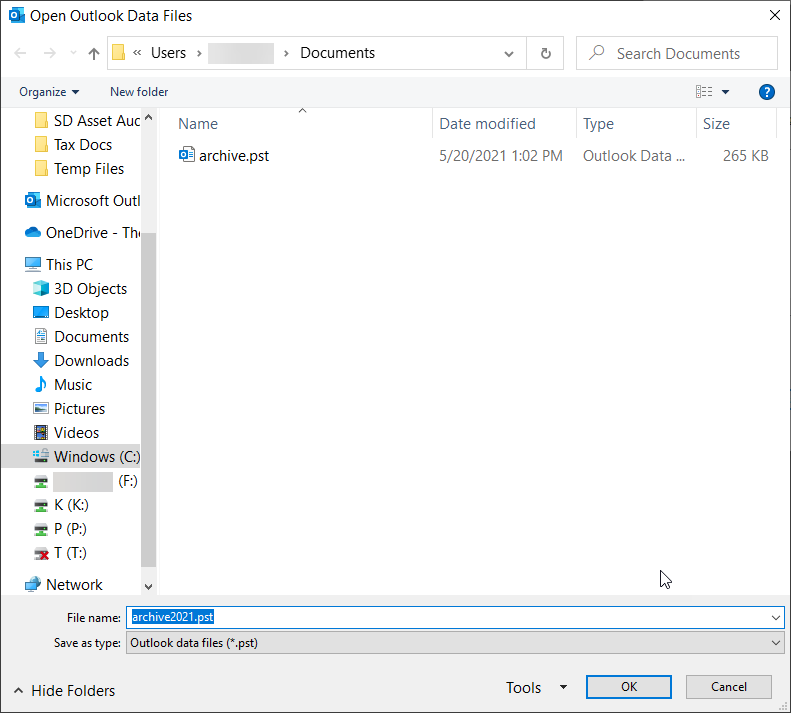
8. Once the archive has been created, be sure to copy it over to your H drive for storage. This is to ensure if your device needs to be re-templated, that you wont lose that archive. Note:  You will have to close Outlook before copying the Archive file to you H: drive.


For more information or assistance, please contact the ITServices Helpdesk - 250.807.9000 or 855.807.9001.
(ONLY FOR UBC STAFF AND FACULTY, NOT FOR THE GENERAL PUBLIC)


Article ID: 1125
Created On: Thu, May 20, 2021 at 12:43 PM
Last Updated On: Tue, Sep 20, 2022 at 4:18 PM
Authored by: Steven Holden

Online URL: https://knowit.ok.ubc.ca/article/creating-an-archive-in-outlook-for-windows-1125.html